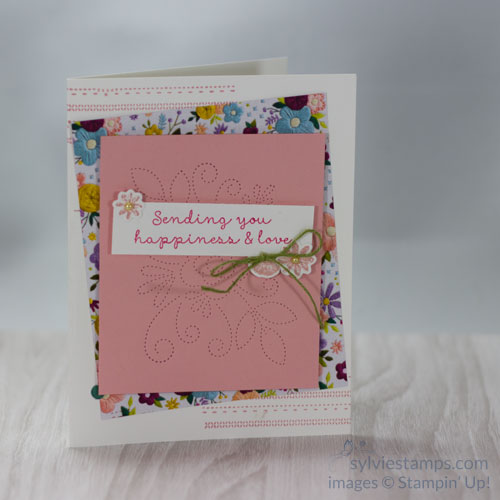
I love the greeting in this handmade flower card as it says: “Sending you happiness and love.” Can you imagine receiving this card from a friend on a gloomy day?
Did you notice the flowers on the Designer Series Paper? They look like they were embroidered right on the card rather than just colored in. The Needle Nook Designer Series Paper has one side that is photographic imagery of hand-stitched embroidery and then the other side has small graphics.
I also love the beautiful stitched design from the Needlepoint Elements dies that you can see on the blushing bride panel. It adds an element of texture that is subtle rather than overpowering.
Supplies
Stamp set:
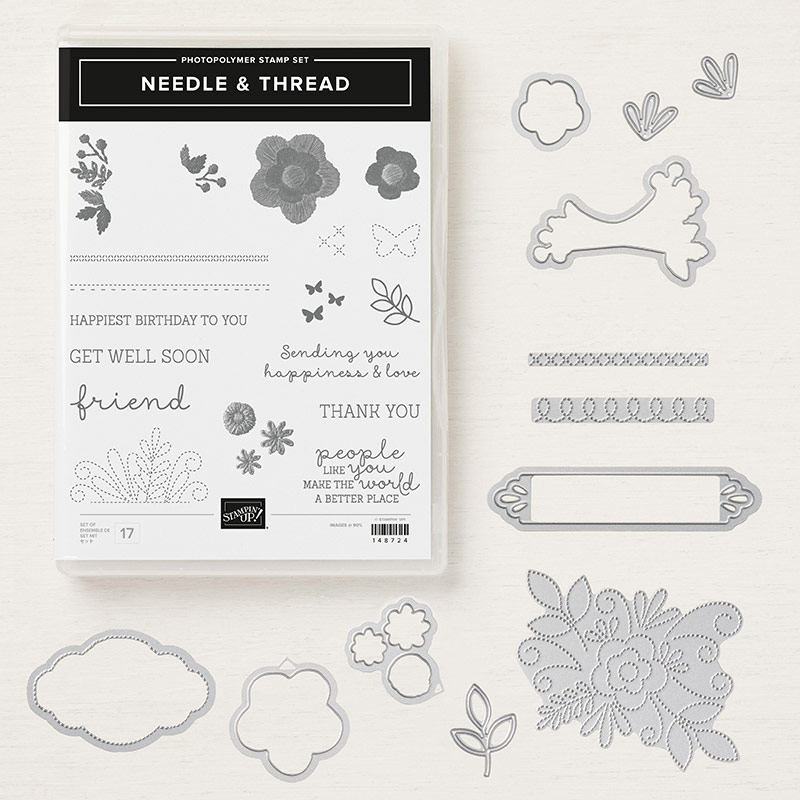
Needle and Thread (148724)*
*Save 10% when you purchase the Needle and Thread bundle (150626)
Paper (including cutting dimensions)
Whisper White Thick cardstock (140272) 8 1/2″ x 5 1/2″
Needlepoint Nook Designer Series Paper (148807) 3 3/4′ x 4 1/2″
Blushing Bride Cardstock (131198) 3 1/4″ x 3 3/4″
Whisper White Cardstock (100730) 3/4″ x 3″ plus scrap for flowers
Ink
Blushing Bride Classic Stampin’ Pad (147100)
Lovely Lipstick Classic Stampin’ Pad (147140)
Accessories
Big Shot Machine (143263)
Needlepoint Elements Framelits Dies (148541)*
Old Olive Linen Thread (148811)
Pearl Basic Jewels (144219)
3263)
Needlepoint Elements Framelits Dies (148541)*
Old Olive Linen Thread (148811)
Pearl Basic Jewels (144219)
Instructions for this Handmade Flower Card
Firstly, you will want to take your piece of blushing bride cardstock and run it through the big shot using that beautiful stitched flower design.
Then, stamp the embroidered small flowers on the scrap piece of whisper white and die cut them with the big shot.
Note: this is a “distINKtive” stamp set, meaning that it has very detailed stamps. Consequently, it needs just the right amount of ink. If you get blotches, use a bone folder and push some of the ink further down into the ink pad. Then ink your stamp and you will have a much better image with all the details.
Next, stamp the greeting with lovely lipstick ink. Also, stamp the stitching with blushing bride ink on the card base.
Finally, you are ready to assemble the card! Adhere the designer series paper with SNAIL to the card base at an angle. Then, using Stampin’ Dimensionals, pop up the stitched panel. Again with Stampin’ Dimensionals, adhere the greeting then you are ready to adhere the flowers with a glue dot. Add pearls and a cute little bow at the center of the flowers.
You know this greeting will make someone’s day. Therefore, choose who you will send this beautiful handmade flower card to today!
If you have any questions about this project, connect with me. To order any supplies, you can follow the links or email me.


