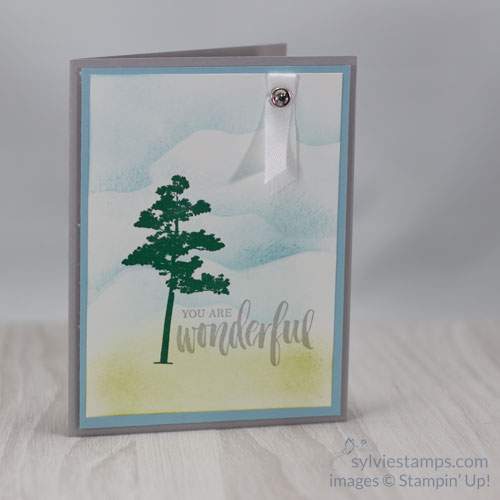
Pretty homemade cards are easy when using sponging which gives that soft look and is great for scenery type of cards. It takes a bit of practice to get the exact look you want but very worthwhile.
SUPPLIES
Stamp set:
Rooted in Nature (w-146479, c-146482)
Ink:
Balmy Blue Classic Stampin’ Pad (147105)
Old Olive Classic Stampin’ Pad (147090)
Shaded Spruce Classic Stampin’ Pad (147088)
Smoky Slate Classic Stampin’ Pad (147113)
Paper (including cutting dimensions):
Smoky Slate Cardstock (131202) 8 1/2” x 5 1/2”
Balmy Blue Cardstock (146982) 5 1/4″ x 4”
Whisper White Cardstock (100730) 5” x 3 3/4″
Accessories:
Stamping Sponges (141337) – cut into wedges
SNAIL adhesive (104332)
Stampin’ Dimensionals (104430)
INSTRUCTIONS
- Firstly, using a sponge wedge, lightly sponge old olive on the Whisper White cardstock. Then,go in little circles, keeping in mind that the place where you first touch will be darkest. You can also dab to add a bit of texture. Start light and add colour until you are happy with the results. Experiment on scrap cardstock if you’d like.
- Trim a piece of scrap paper in the shape of “clouds.” Then using another wedge, sponge the sky. Start on the scrap paper and move towards your project. Move the “clouds” around and sponge a bit of colour where the scrap paper was to make the sky a bit softer. Again, you may want to experiment on scrap Whisper White first.
- Stamp the tree in Shaded Spruce, then stamp the greeting in Smoky Slate.
- Adhere your scenery piece to Balmy Blue using SNAIL adhesive. Then, adhere the panel to the Smoky Slate card base using Stampin’ Dimensionals.
- Give it away now that you have pretty homemade cards!
This tutorial first appeared in an email that I send every week, as well as tips, news from the stamping world and more. Are you part of the Sylvie Stamps Community yet? If not, join up!

